In this article, I’d like to talk about how to build a video rig. Turning your camera (DSLR or Mirrorless) into a video camera. When I first started out, after finishing classes about filmmaking I still had no idea how to actually assemble a rig. It’s something I didn’t learn in particular, just filmmaking in general which is such a huge topic that couldn’t be covered in a more general course. After I bought my first professional (photo) camera I was looking for the parts to “rig it up”. I only saw already assembled rigs before, with a bunch of stuff attached around the camera. When you just start out, it’s hard to find all the parts that are “necessary” for a basic rig. I found myself making one order after another to get all the parts I needed. Once I thought I had everything, I noticed there was still something missing. You can end up spending much more money than expected originally. I estimated the costs to be around 500$ but in the end, it was around 800$. That’s why I decided to write an article about how to build your first rig to help those who want to start their filmmaking career.
I’m going to explain what parts build a basic rig and provide you with a short manual on how I put my rig together.
What is a rig?
A camera rig is a support system that allows you to attach multiple components to control your camera movement, focus, and stabilization. It’s assembled from individual components to fit the needs of the camera operator. You can attach an external monitor, microphone, separate handles, a follow focus, extra batteries, and other equipment to the rig, depending on the type of rig. In short terms, the rig is everything around the camera and lens itself.
The Basics, the camera and lens
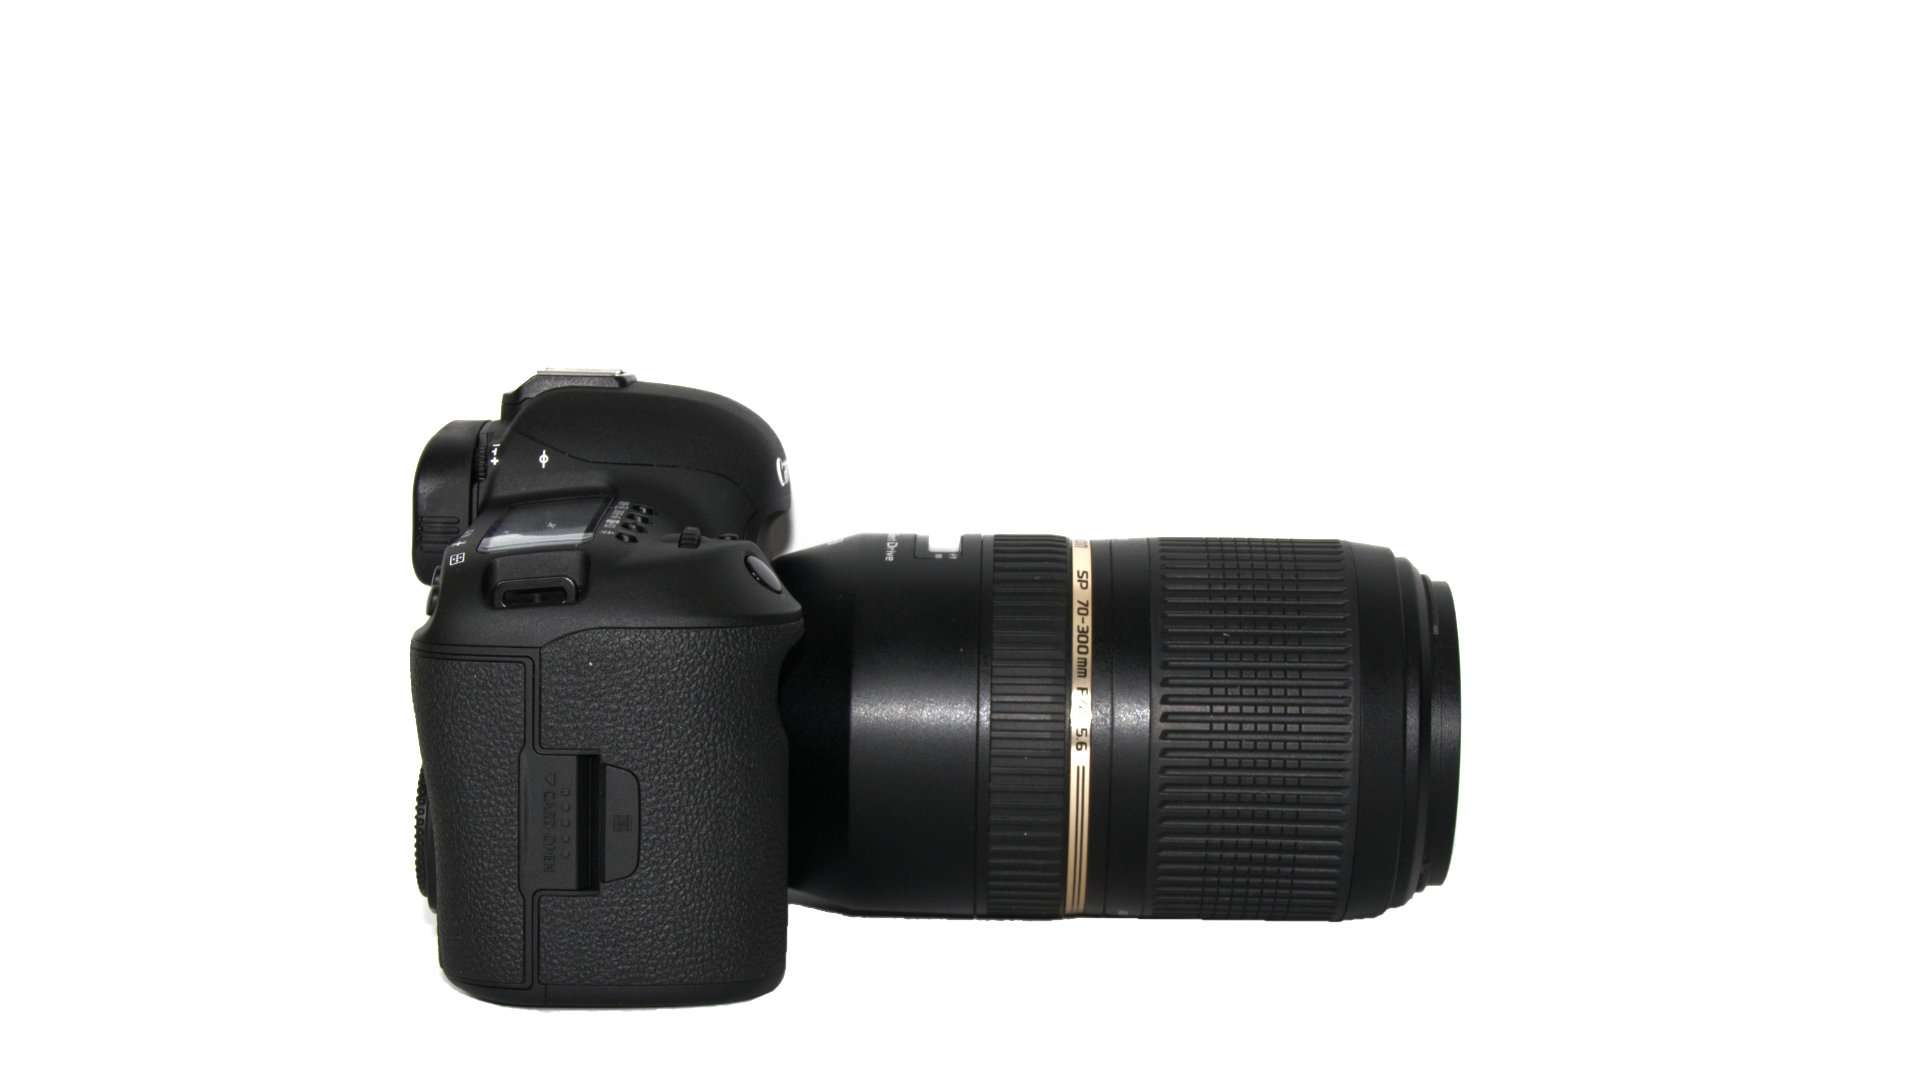
Let’s start with the basics before you start building your own rig. What camera do you use and what lenses do you have? In my case I’ve got the Canon EOS 5D Mark IV, a proven and very robust DSLR, with three different lenses. I currently have the Canon 50mm 1.8 STM, Tamron 18-200mm F/3.5-6.3 Di II, and the Tamron SP 70-300mm F/4-5.6 in my kit.
There are two different types of lenses. The ones that have a focusing system that works internally, meaning that the focus lens does not push out of the body of the lens. The second type is when the focusing lens elements push forward and leave the lens body to focus their subject. The Canon 50mm 1.8 STM is one of those lenses which is why those types of lenses are not recommended for use in rigs because they’re attached through the filter thread of the lens to the Mattebox. That means when the lens is attached like that, the focusing motor is trying to focus but it’s held by the Mattebox. You’ll hear an electronic noise when turning on the camera. Do not use the lens in such a setup, because it could damage the lens’s focus motor.
Lenses with actual moving focusing parts that stand out of the main body of the lens are not meant to be used in a rig setup.
Lenses with focusing elements that don’t leave the body while focusing are suited best.
The cage and base plate
To start building your rig you first need a cage, which is the main attachment point. A camera cage is a Fram that surrounds the camera body without covering any buttons or inputs. It’s also another protection for your camera. When I use my 5D for just Photography work, I leave the cage always on. I like that extra protection and bulkiness. Depending on the cage it gives you an extra point of contact to safely grab your camera out of a bag. For my rig, I chose the Smallrig Cage for the Canon EOS 5D Mark III/IV. It’s a solid option, very robust, and with a lot of attachment points, including two cold shoe mounts, extra belt mounts, and screw holes for attaching the accessories. It’s mounted underneath the camera by a single screw you usually use for putting the camera onto a tripod. Simply place the camera in the middle of the cage and tighten the screw with the tool that comes with the cage.
That’s the first step in building your rig. It’s up to you if you keep the cage attached to the camera at all times or not. Note that the arrangement of the holes is different when you attach the camera to a tripod now. Try to find a fitting point to balance the camera on a tripod next time, or get rid of the cage when using a tripod, it’s up to your preferences.
Next up is you attach the base plate with usually two screws to the cage. It not only serves to get the rig straight but also supports the rods. Underneath the base plate are yet again screws to mount the system to a heavy tripod. At this point, many photography tripods ain’t a good fit anymore because the plane of contact is too small to keep the camera system mounted properly. Some base plates offer additional screw holes in the front and back for various purposes. The base plate gives the system a larger point of contact when putting it anywhere.
Both the cage and the base plate turned the camera into an even more robust tank than it already is. So far so good. We’re ready to go beyond the basics and start to actually build the rig by throwing all the other accessories on it.
The rods and Matte box
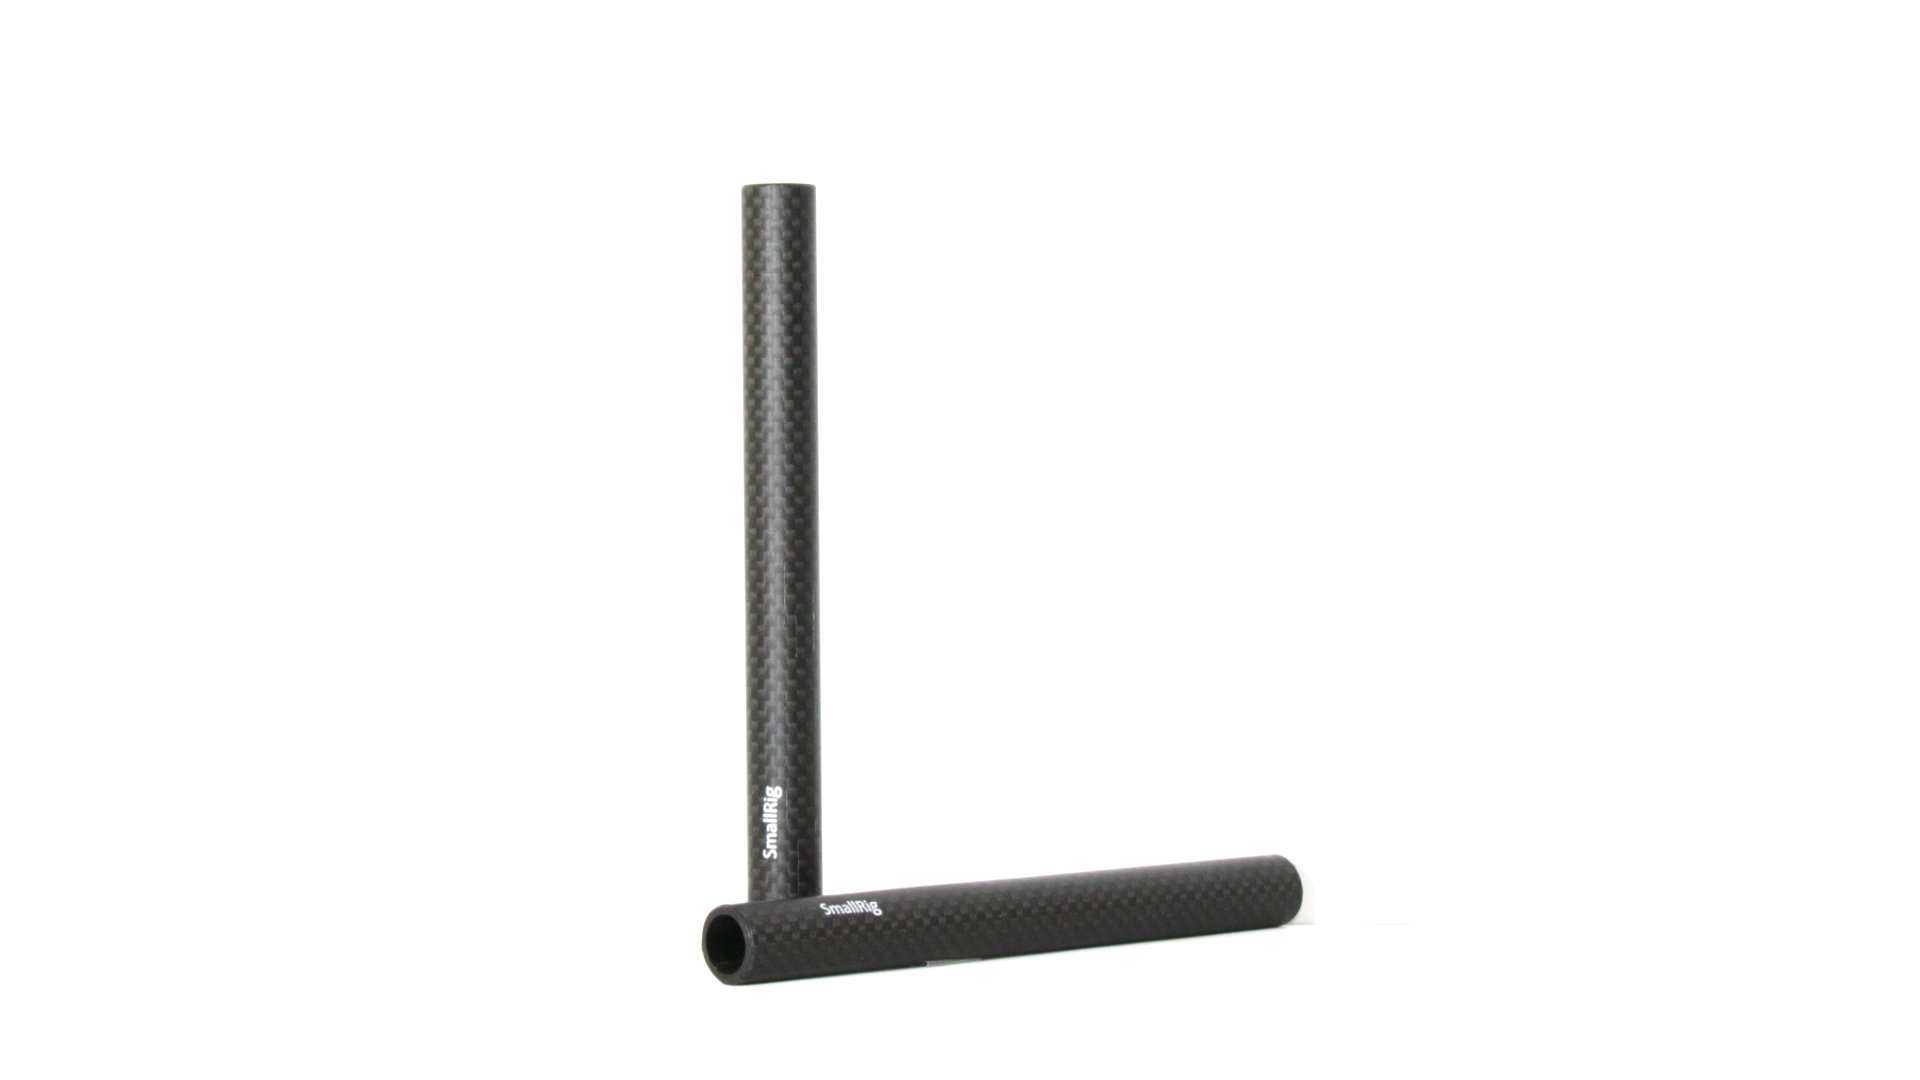
The rods are simple two tubes that are available in different lengths to match the size of the lens. They’re either made of aluminum or carbon fiber and get inserted into the holders of the base plate. I chose a pair of SMALLRIG 15 mm Camera Carbon Fibre Rods (6 Inches) – 1872 to build my setup. That should do just fine for smaller and medium-sized lenses. But keep in mind to get longer ones depending on the lenses you have.
The Mattebox is what makes the rig really stand out as a film camera. Other than that the purpose is to further block the sun rays that could hit the lens and cause lens flairs. It has a similar purpose as lens hoods in photography. Another feature of a Mattebox is the filter thread. You can slide in rectangular or square filters into a sled for quick switching IDs or other filters.
To attach the Mattebox to the system you need an extra piece that connects the Mattebox to the rods. You screw the box onto the little support system and slide it onto the rods. Slide it so far that the ring of the Mattebox surrounds the lens with the adapter completely. Make sure it sits evenly.
Now you can tighten the little screw that holds the lens adapter in the box itself. If you have trouble sliding the Mattebox onto the rods, lose the rods at the screws of the base plate.
External Monitor and separate Microphone
The built-in microphone of most cameras isn’t really usable other than as a reference for synchronizing audio from other sources. I got the Rode Video Mic Go 1 with a cold shoe mount for my setup. It’s simply attached to the left side of the cage. If you’re left-handed, you could attach it to the opposite side. Once the mic is mounted all you need to do is plug in the cable that connects the mic to the camera and you’re ready to go.
Keep in mind to check the audio levels though before starting your recordings on location. An external mic really bumps up the quality of your footage. Audio is much more important than the actual image, so good audio is crucial and there’s no way to not get at least a low-budget microphone like this.
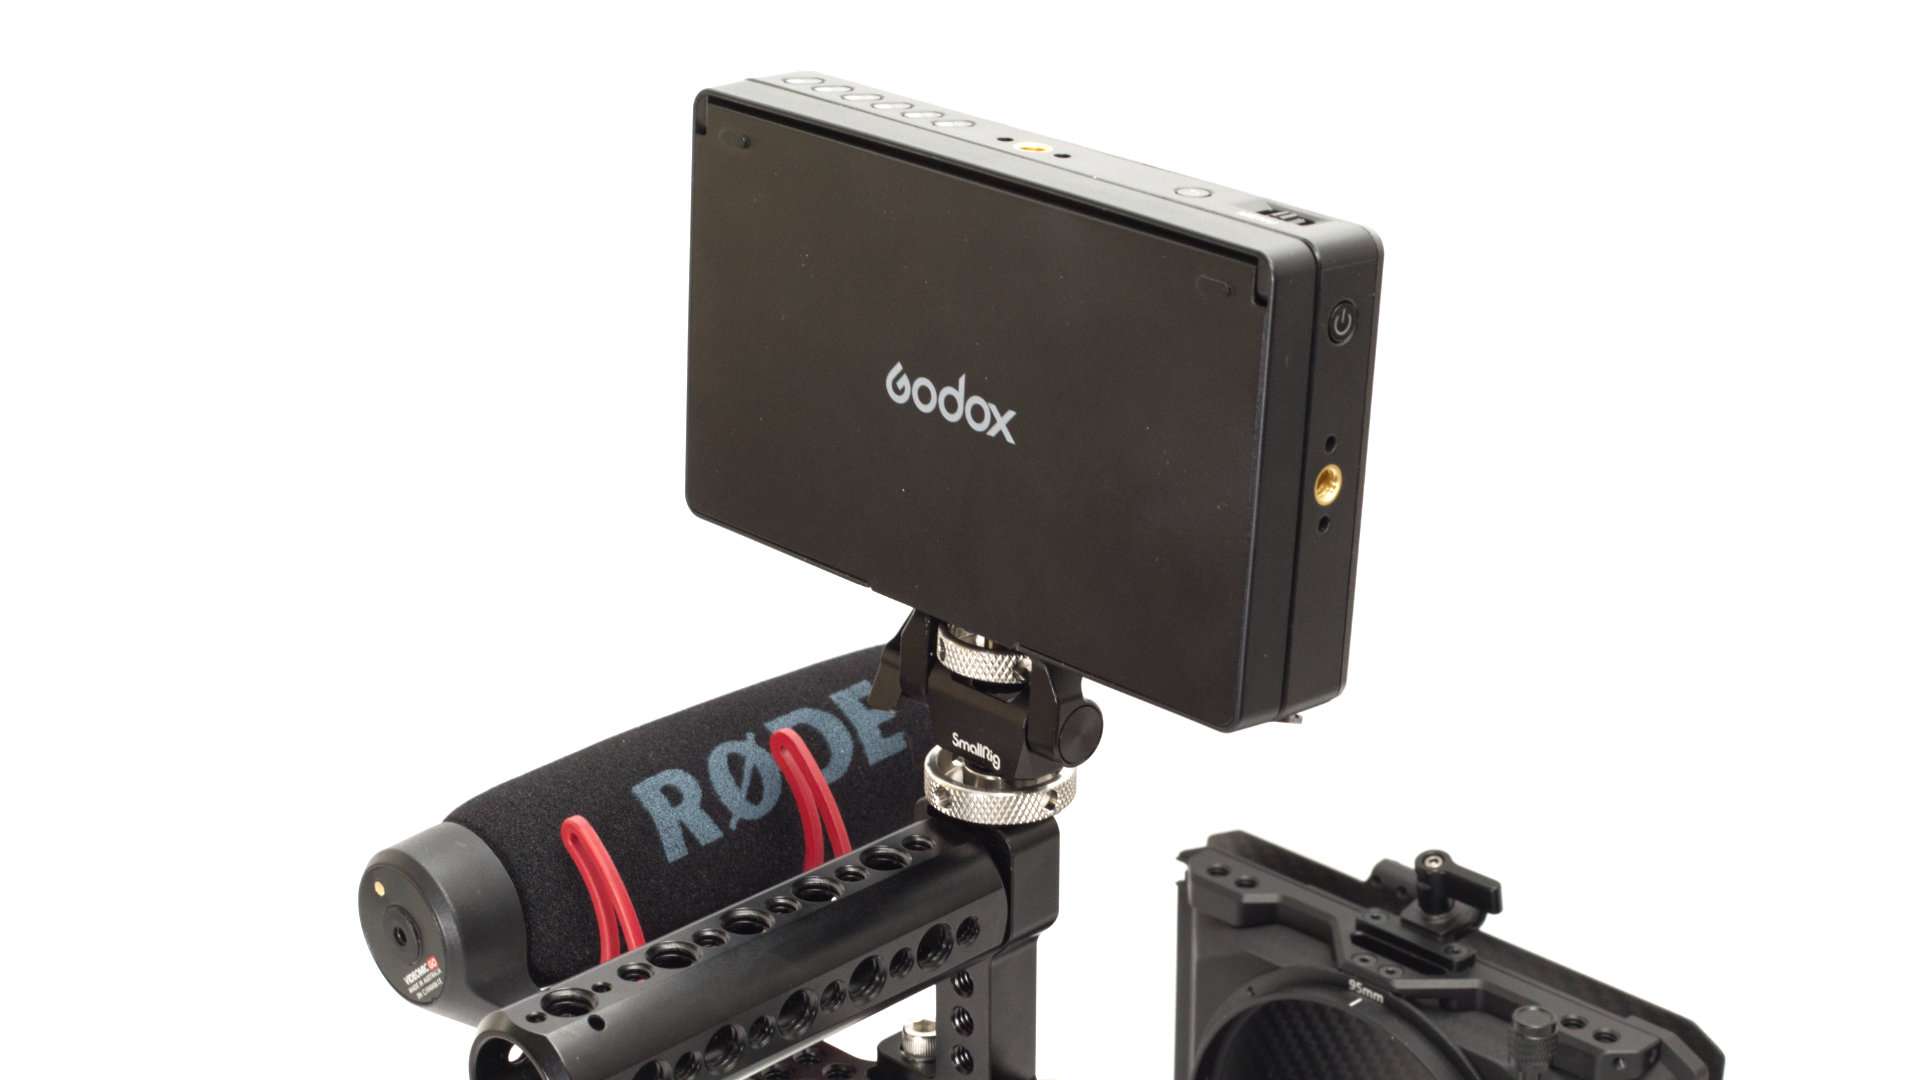
Depending on your camera, you might consider using an external monitor. The 5D has a decent monitor with a good resolution but, it’s not tillable which is a total bummer for shooting low angles or other positions that prevent you from having the camera near eye level. The Goddox GM55 is an affordable option for an external 1080p full HDMI monitor. It comes with accessories like a sun shield and a monitor mount so you can directly mount it to your cage. What you still need is a battery and an HDMI (to mini HDMI) cable that is long enough for your rig. I have a cable that’s either too short (by one cm) or way too long. Both ways it’s annoying so make sure to choose the cable that fits your individual rig. Due to my inexperience, I purchased a separate monitor mount from Smallrig. The one that comes with the monitor is just fine though.
After I got the batteries for the monitor and attached them to the back I was greeted in Chinese. Yeah, the monitor is first set to Chinese (at least mine was), but after pushing some buttons and guessing where to find the language settings I managed to set it to English. But let me give you a roadmap, so you don’t have to figure it out yourself …
How to change the language of the Goddox GM55 external monitor:
There you go, it speaks English now (for most of the time at least) 🙂
Both the mic and monitor make this setup “complete”, at least for now. You’re ready to go now. The most important thing is to actually start shooting and gaining experience. Gear is not as important as skill and talent to tell stories.
Additional Accessories
When you thought you were done by now … kinda. You can get out there and shoot, but this is not where the journey of building a rig (can) end.
I added two more things (to this day) to my setup. 1. An extra handle to hold the camera and mount the monitor on top. 2. 4 little cable clamps to help organize that wire mess. Everything that goes beyond this is totally optional, like a follow focus, extra batteries, and external recording devices. You can possibly spend a lot more money on your rig. But you don’t have to, it’s your personal equipment that should suit your style and ergonomics the best. The further you step up, the more advanced your rig can get. But for now, you’re very well equipped.
Let’s assemble the rig
Step by Step manual to build a basic video/film camera rig for DSLRs and Mirrorless cameras. Once you got all the necessary components you’re ready to assemble the rig.
When to rig your camera up and when you don’t need to
That is totally up to you, your style, and what you’re going to shoot. Sometimes a rig is just another obstacle that hinders you from getting the best footage possible, especially when you’re in really tight spots. When the sky is overcast and no sun rays are hitting the lens it doesn’t make too much sense to put all the gear together. Really concentrate on getting the shots. Think about the environment, where and when you shoot. Answering that question in general is not as easy as it might appear. You’ll have to get your own experiences.
I find the rig helpful because the extra weight helps me to hold the camera steadier than I would without the rig. When shooting with the Canon 50mm 1.8 STM I’ve literally no image stabilization. The extra weight and a decent steady hand can help to balance the footage out. So for that sake, it makes sense to rig the camera, if you don’t have any image stabilization.
Shopping list for your rig
Here’s the list of the rig I’m using at the moment. If you have a different camera, you only need to find a different cage, that matches your camera model. When it comes to the filters, you need to either find ones that are in the right format or get the ones I got and cut/grind them until they fit into the sled of the Mattebox. The rest of the parts should fit. But I can’t give any guarantee if they don’t. This list is intended to give you an overview of what you need for your own rig.
There’s no general rule of thumb on how to build the “right” or “perfect” rig for shooting video. It’s all a matter of personal preferences and style. The basics however like, cage, base plate, rods, and Mattebox are always the same. Once you’re confident in putting that together, you’ll find what components you might want to add to your own setup.
Another positive aspect o using a rig like that when starting out is, that it simply looks cool and professional when you get your first job or when you’re just filming events nearby. I was asked a couple of times if I’m from the local television or from the press.
I hope this helped you a bit, giving you an overview of building your first rig and getting started as a filmmaker. I wish you all the best and happy shooting.