10th of March 2024
Category: Filmmaking, Behind the Scenes
phot by Setyaki Irham on Unsplash
Resolving rendering issues in DaVinci Resolve
What is this article about?
During the rendering process of my short film “The Camera” I ran into issues. It took me a whole month to finally resolve those issues and find a solution. In this article, I want to share my experience and give you tips, tricks and methods to get most projects done.
The situation
The camera is a 10 min. horror short film, shot on the Blackmagic Cinema Camera 6k Full Frame. Shot in BRAW I added several nodes in the color page in DaVinci Resolve Studio 18 to create the final look. CST (Color Space Transform), Halation, Film Grain, Glow, and some other effects were applied to the ghost scenes to provide a certain ghostly appearance in the final image. It later turned out that those effects caused my system to constantly crash because the workload was simply too heavy.
The technical aspects
The editing system
2019 Apple MacBook Pro 16″
2.6 GHz 6-Core Intel Core i7
AMD Radeon Pro 5500M with 8 GB
32 GB 2667 MHz DDR4
macOS Sanoma 14.3.1
The footage
6K Open Gate BRAW
ProRes Proxies
The edit
4k timeline (4096×1716)
24fps
Option 1 - Optimizing your program settings
I was looking up YouTube videos to find a solution for the ever-crashing system. Although those videos didn’t help me much in this specific scenario it’s a good starting point to first optimize your system for optimal performance in general. These settings get the most out of your system it might already help in your case.
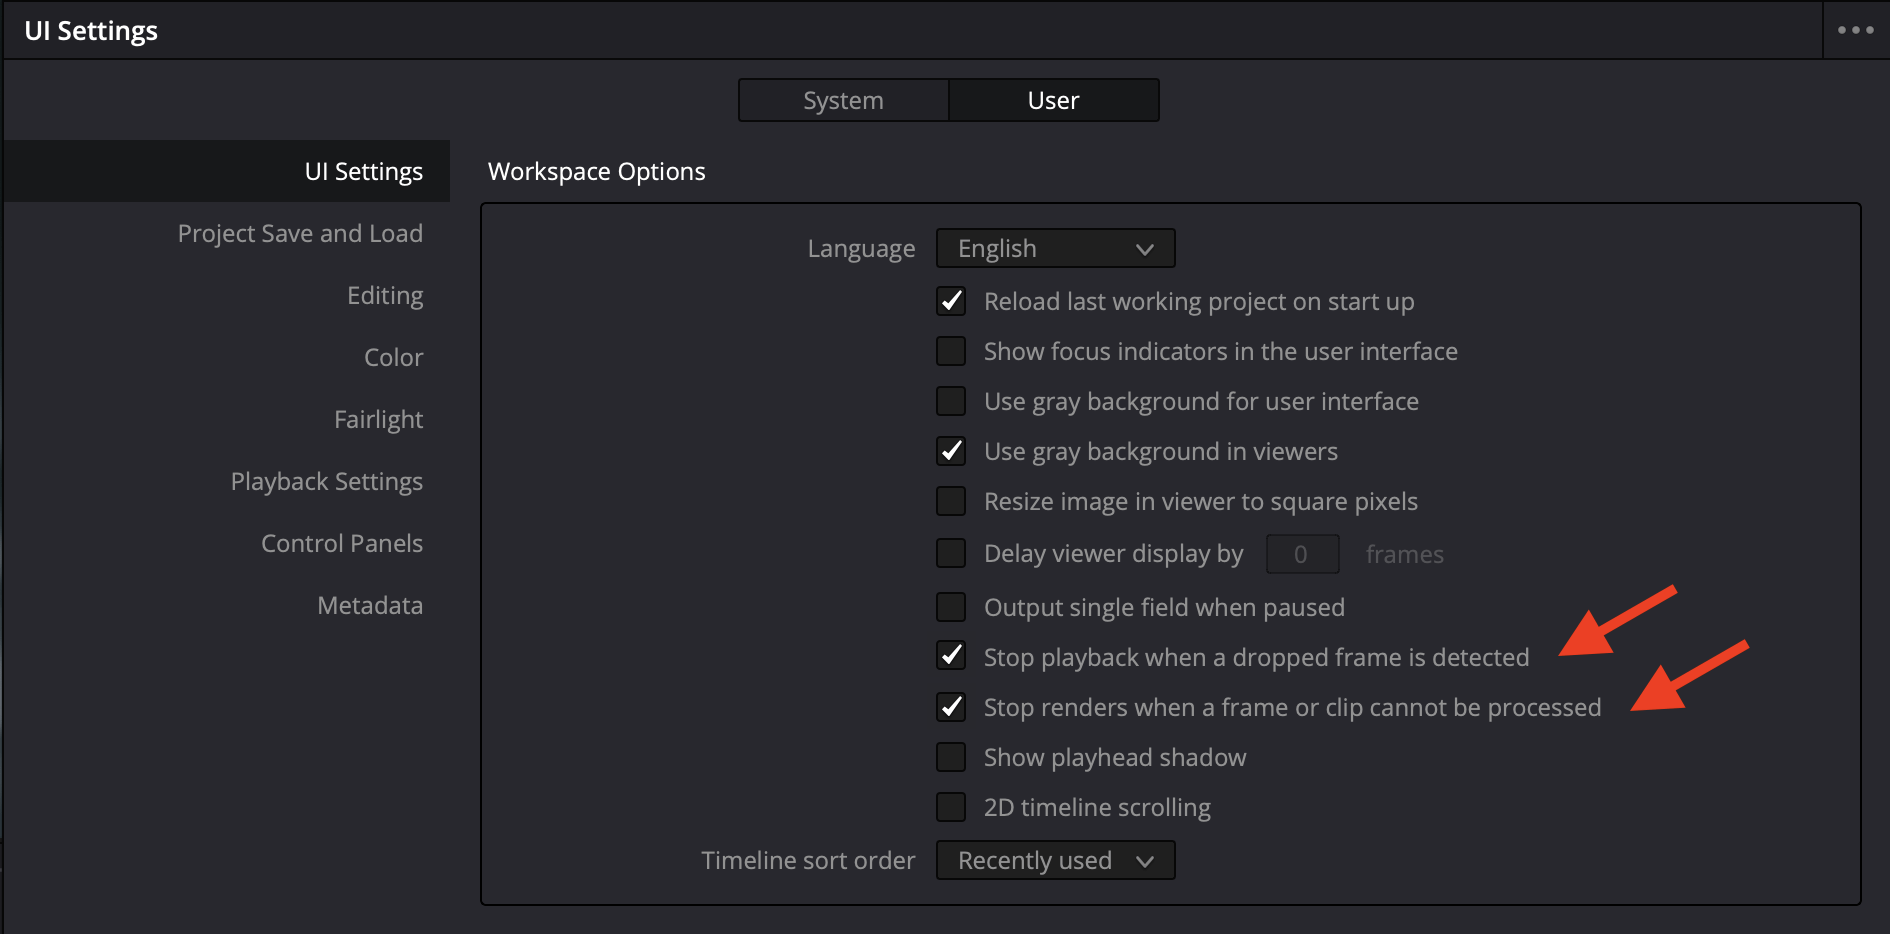
UI Settings
Check the two menu points to prevent Resolve from stopping the render when experiencing difficulties.
- Stop playback when a dropped frame is detected
- Stop renders when a frame or clip cannot be processed
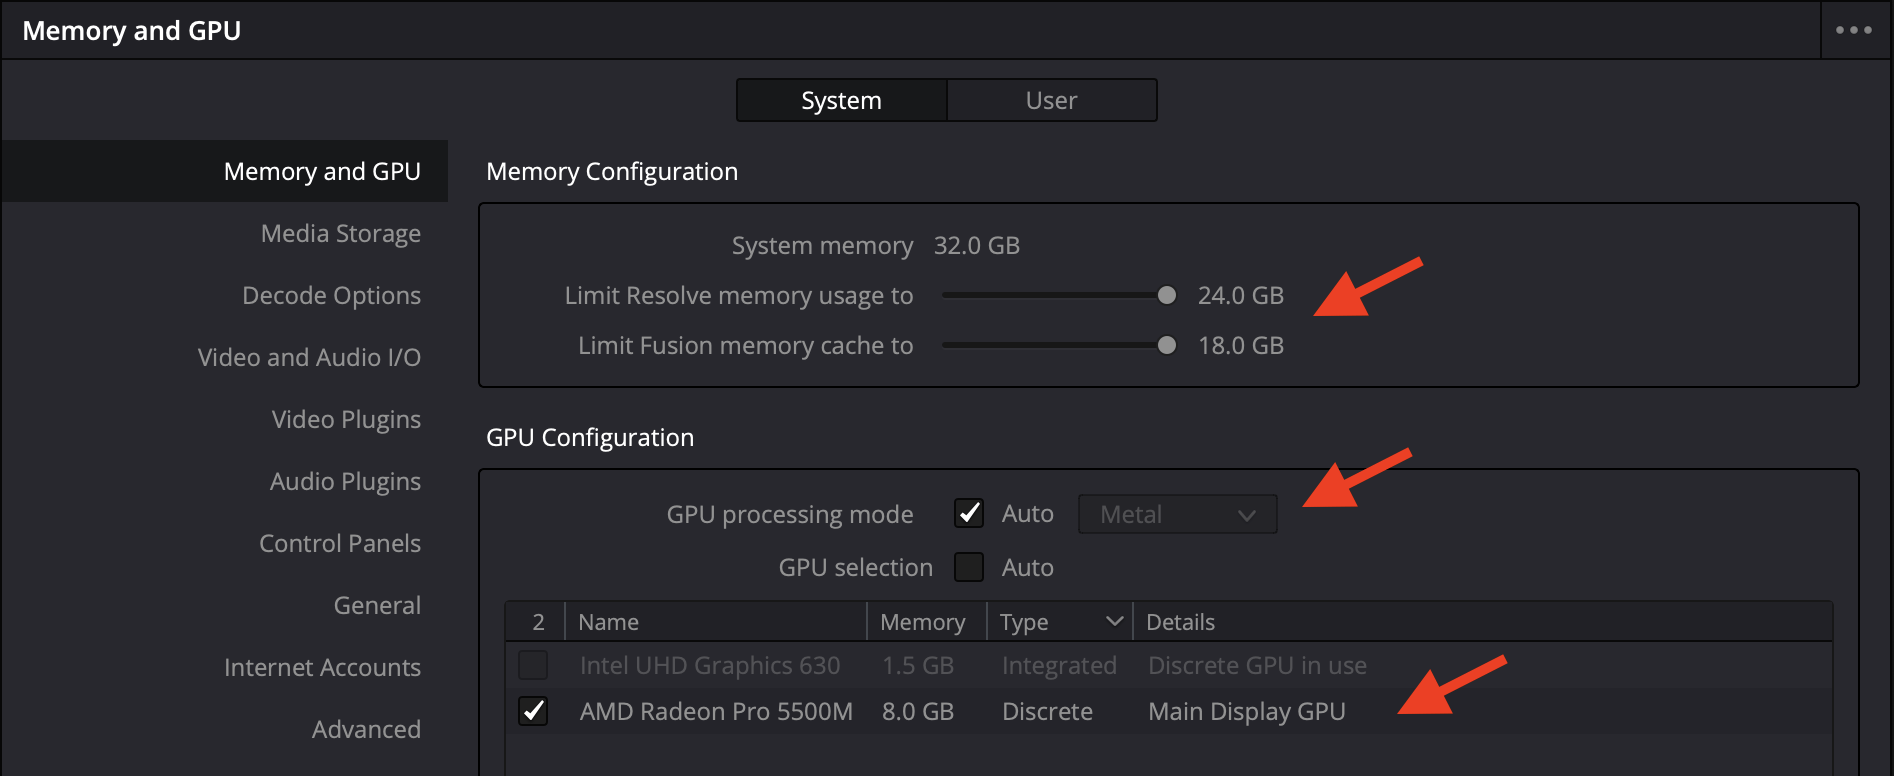
Memory and GPU
Make sure to give Resolve as many resources as possible. by increasing the memory and selecting your dedicated GPU. The GPU processing mode can also make a difference.
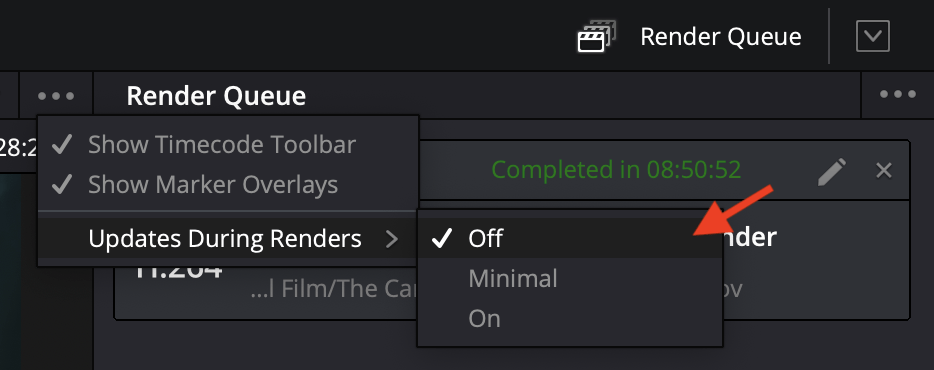
- Go to the Export tab
- Click the three dots next to “Render Queue”
- Hover over “Updates During Renders”
- Turn this option “Off”
Render Queue
Usually during the rendering Resolve provides you view a preview of the final export in the viewer. This requires further resources. By setting the point “Updates During Renders” to “Off” you won’t see a preview, the image in the viewer stays at one point during the whole rendering to save resources. Click the three dots next to “Render Queue” in the Export tab to access the settings.
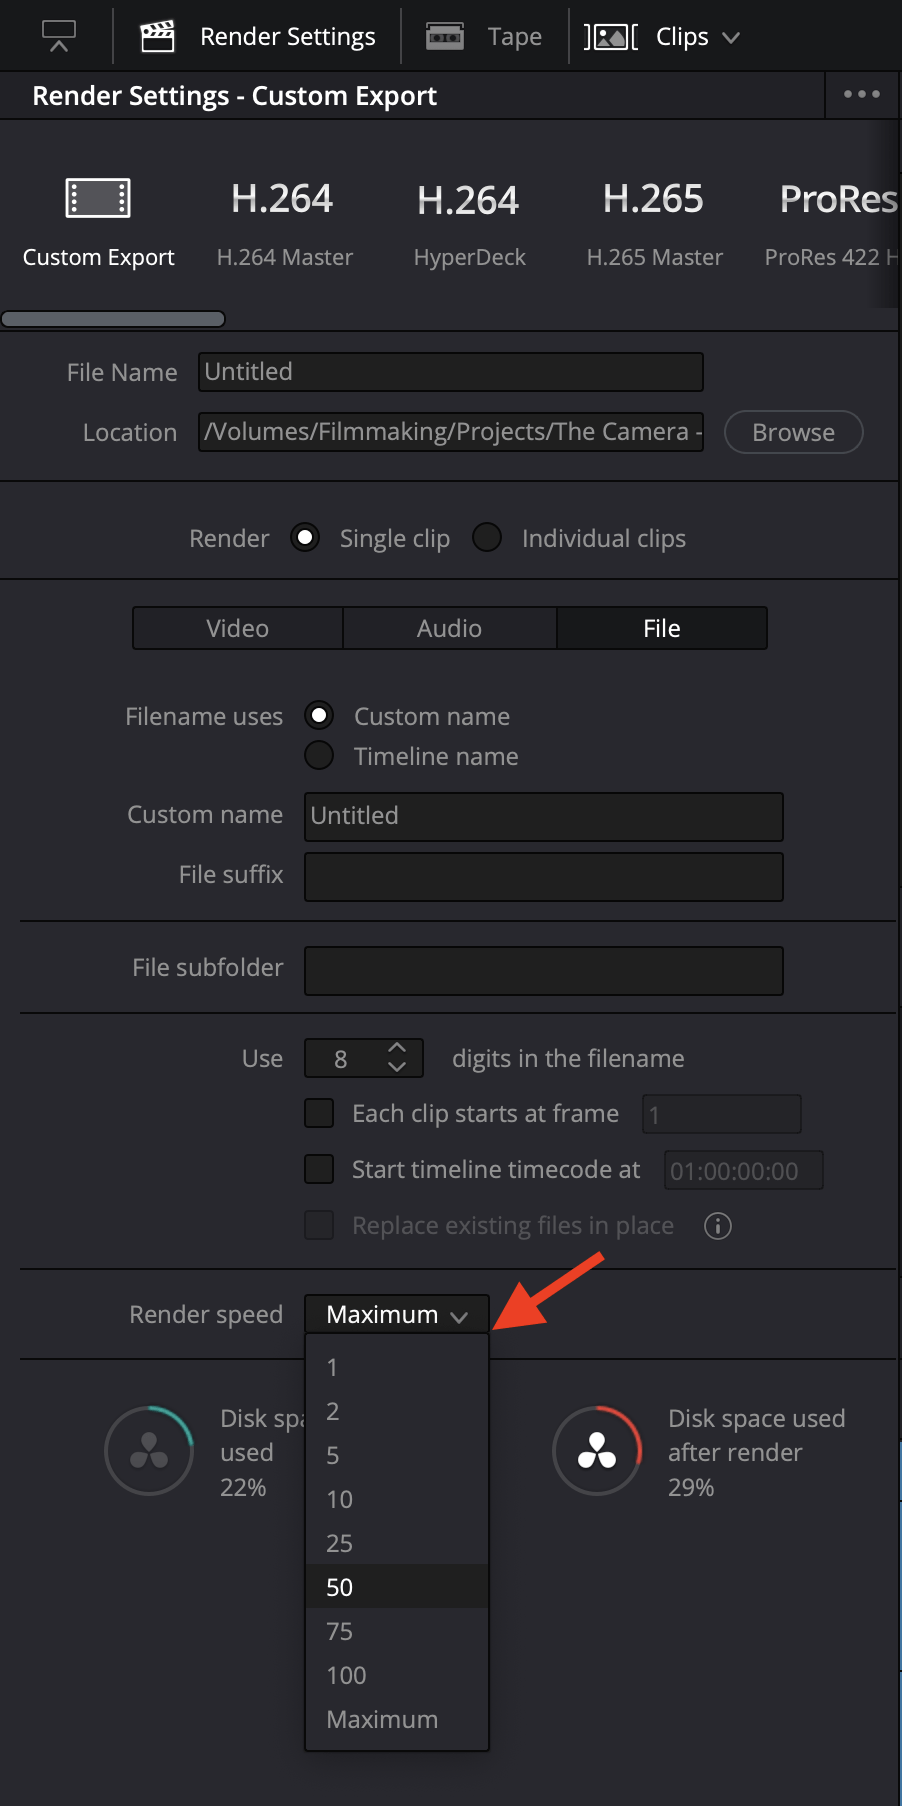
Render Speed
When choosing “Custom Export” in the export tab of Resolve you’re in full control. If you click on the point “File” you can tell Resolve to not render at maximum speed, which is the standard setting. By choosing a lower percentage your system won’t be forced to use all resources and render at fullest speed. Slow it down to give your system more time to process and render your project. The final render will take much longer but it might not crash at all.
- In the render tab choose “Custom Export”
- Go to “File”
- Under “Render speed” lower the setting from maximum to something below 75, depending on your system
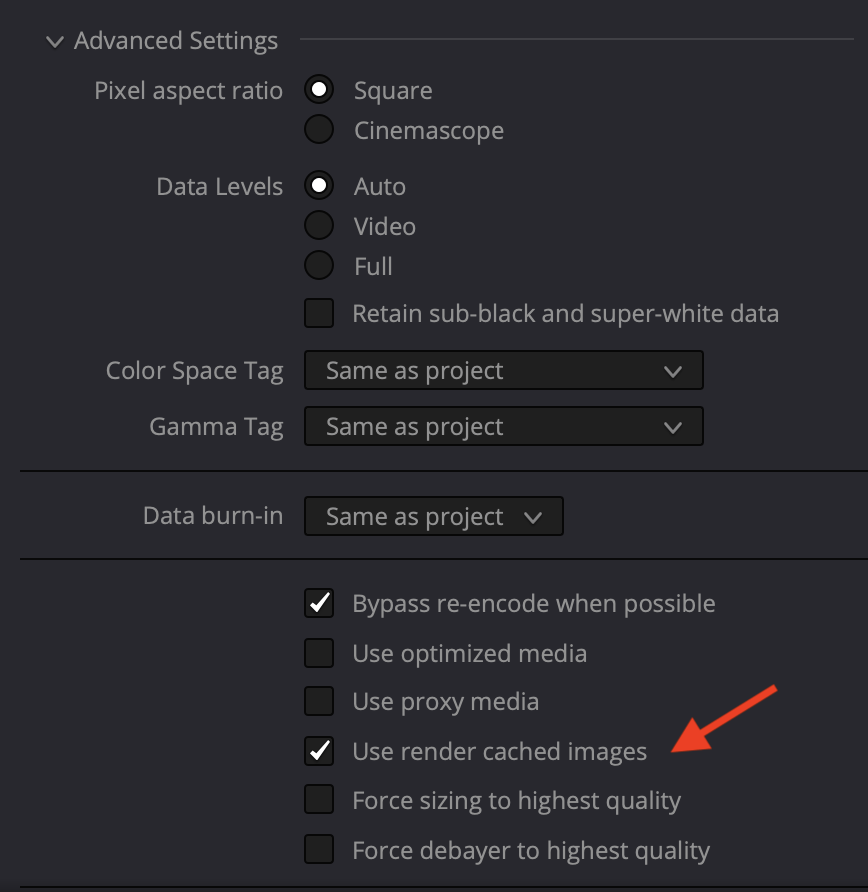
Advanced Render Settings
In the same “Custom Export” menu under the “Video” tab, you can choose “Use render cached images” if you have cached clips beforehand. DaVinci then uses the clips that have been cached and only does the encoding for the final export of those clips.
Tips during the rendering process
Another tip to reduce the workload of your System (in this case the GPU) is to simply minimize DaVinci Resolve so the screen doesn’t have to refresh all the time.
Once you’ve made all these changes in the settings your resolve is optimized for its best rendering performance, this might solve a couple of rendering issues already. However, in my case, these settings didn’t make any changes and I had to dive deeper into the troubleshooting toolbox.
Option 2 - Render in Place
In DaVinci Resolve, “Render in Place” processes and replaces a clip within the timeline with its rendered version, preserving the original clip’s effects. On the other hand, the standard render export produces a separate video file, maintaining the original clip in the timeline. “Render in Place” is efficient for in-place adjustments, while standard render export is ideal for creating standalone files without altering the timeline.
There are two different methods to use “Render in Place”, you can either render the clip in place that causes the issues as long as you’re aware of that or you create a compound clip of the whole project and render that in place.
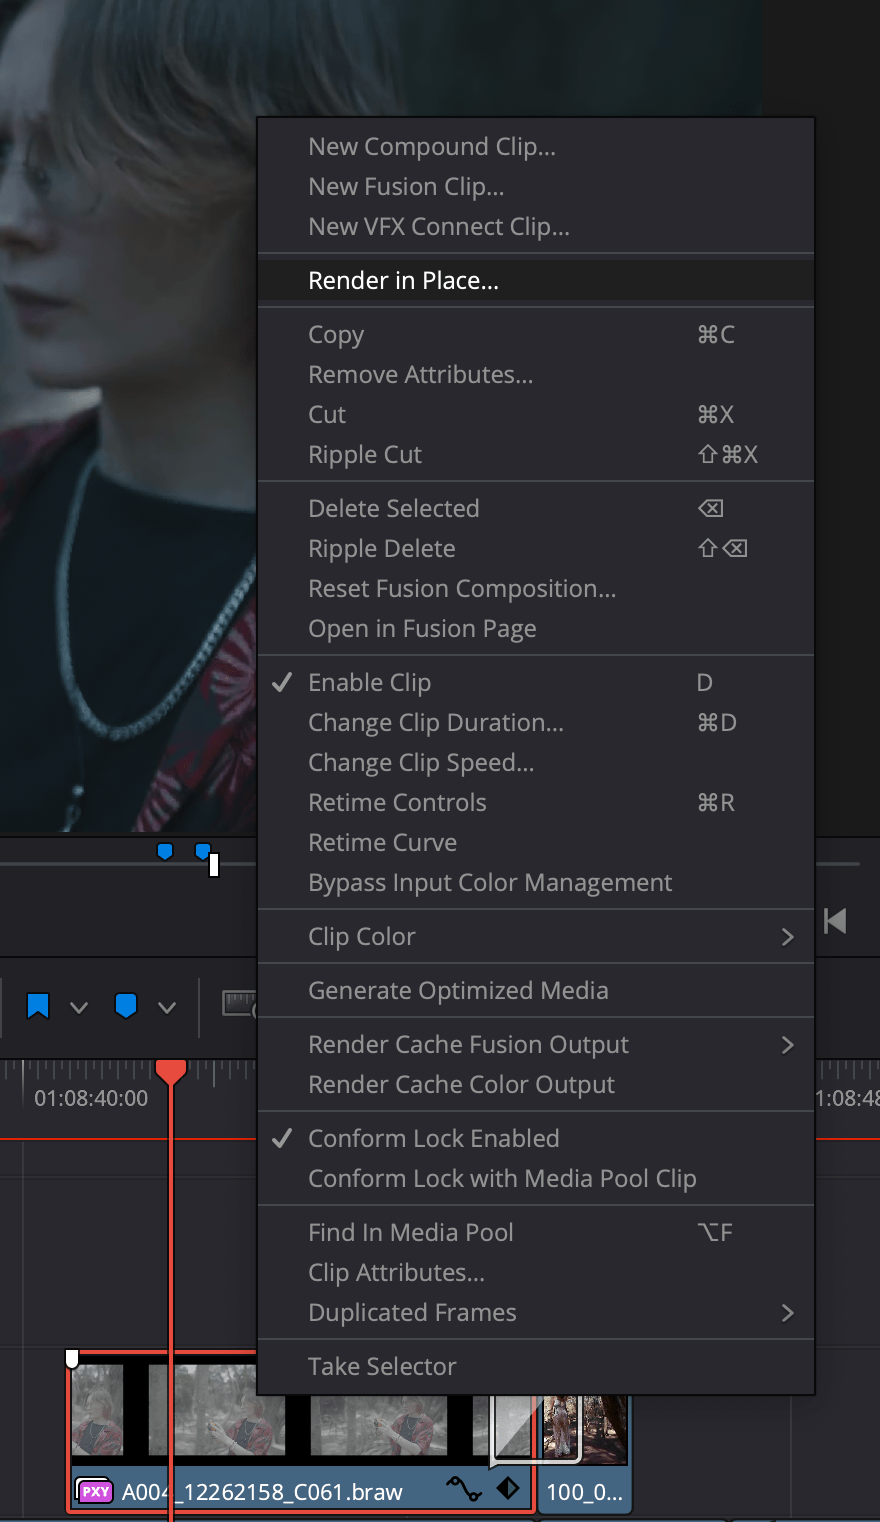
- Right click on the clip
- Render in Place
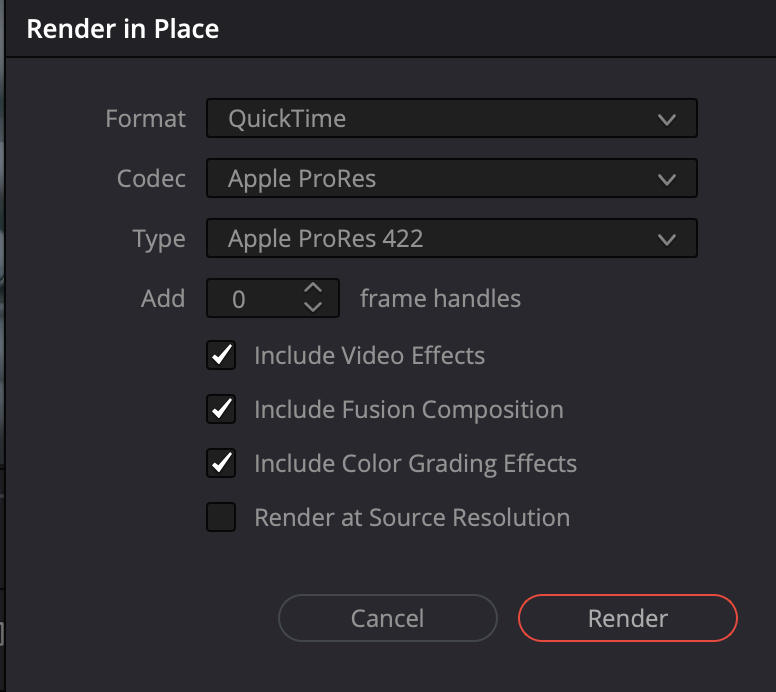
- Choose the Format (QuickTIme)
- Codec (Apple ProRes)
- Type (Apple ProRes 422) or a less compressed type
- Include Video Effects, Fusion Compositions, Color Grading Effects according to your needs
- Click “Render”
- Select a location where the new clips shall be stored
If you have multiple clips you want to Render in Place, you can create a compound clip of those. This will put the selected clips into a new clip which can later on be accessed like a normal timeline within the clip itself.
- Select all your clips
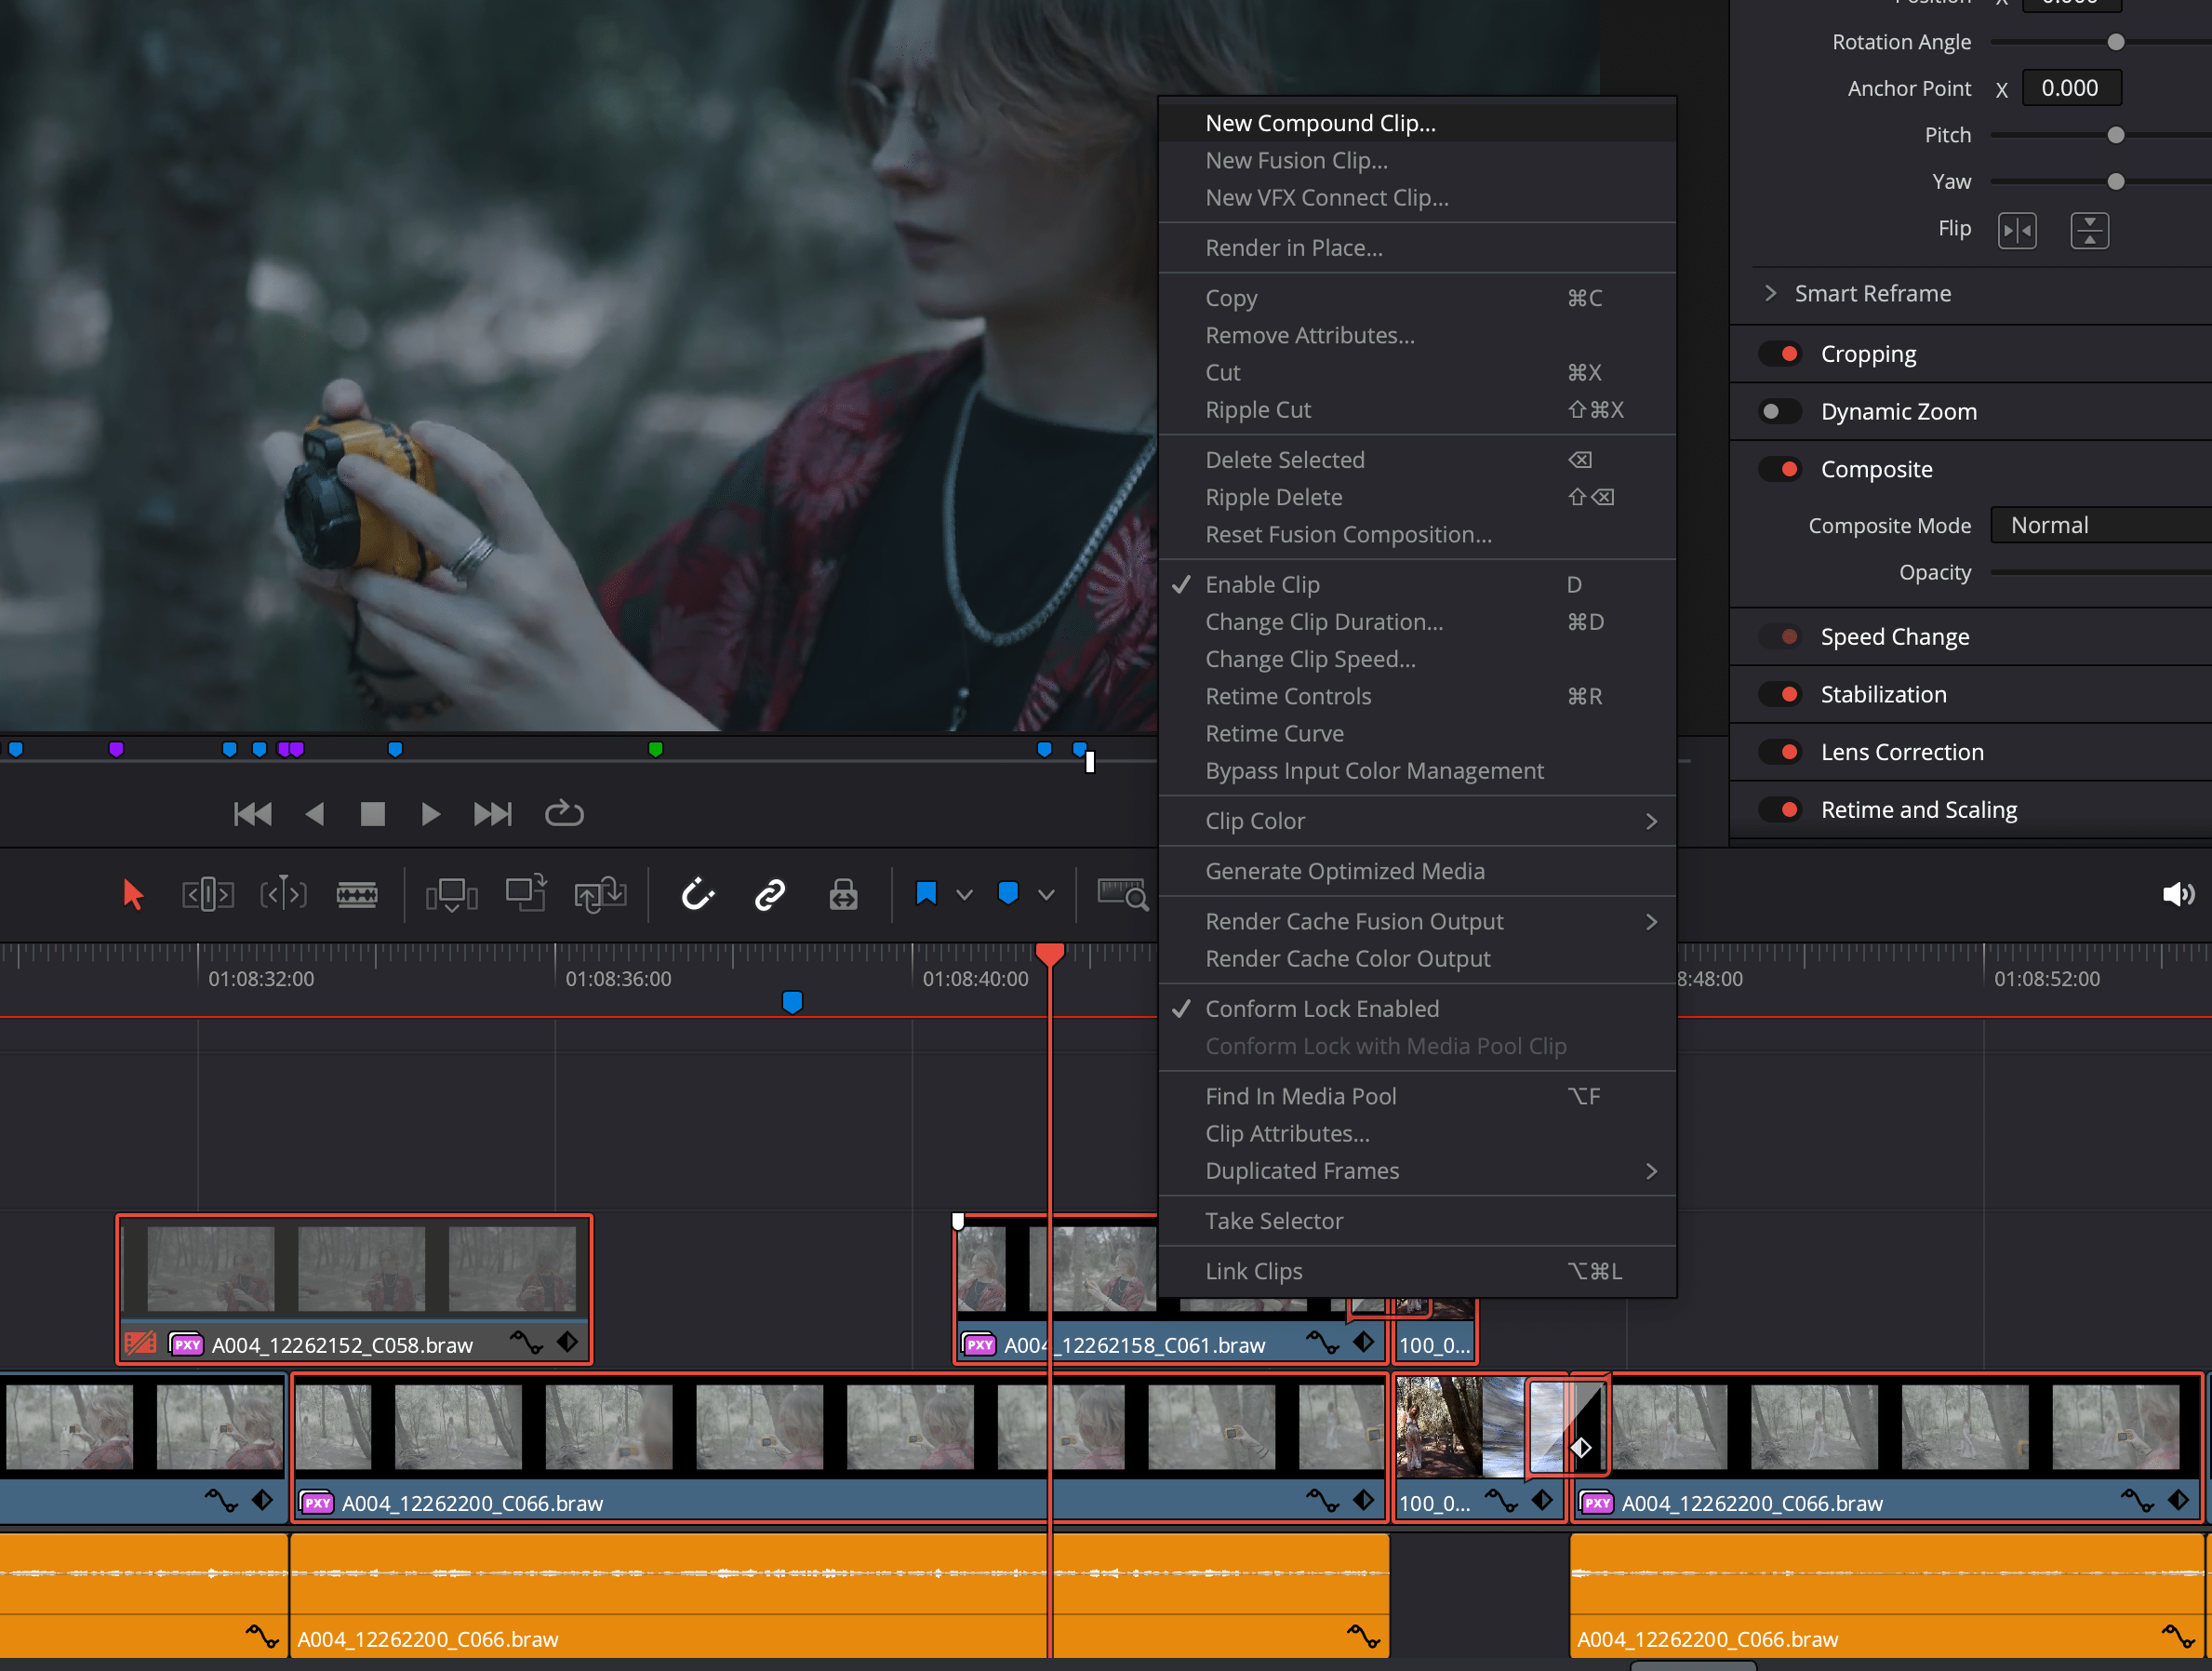
- Right click
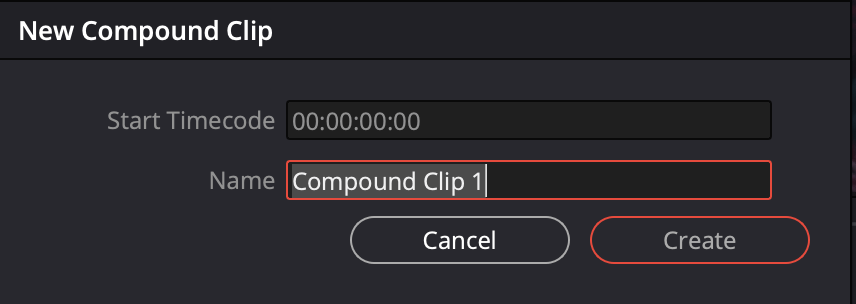
- Select “New Compound Clip” at the very top of the list
- Name your compound clip accordingly
- Click “Create”
- Now you can follow the procedure I mentioned to render this compound clip in place.
Yet again I have to tell you that “Render in Place” did work partially but my system was still crashing. So I used mostly the next option and got back to this one to render a few parts in place.
Option 3 - Exporting an image sequence - Part 1
What is film exactly? It’s basically a sequence of still images played after another to create the illusion of motion, a motion picture, in the realm of traditional cinema 24 frames (still images) per second.
The following method pretty much was the key to render out my short film “The Camera”.
- Create a compound clip of your timeline
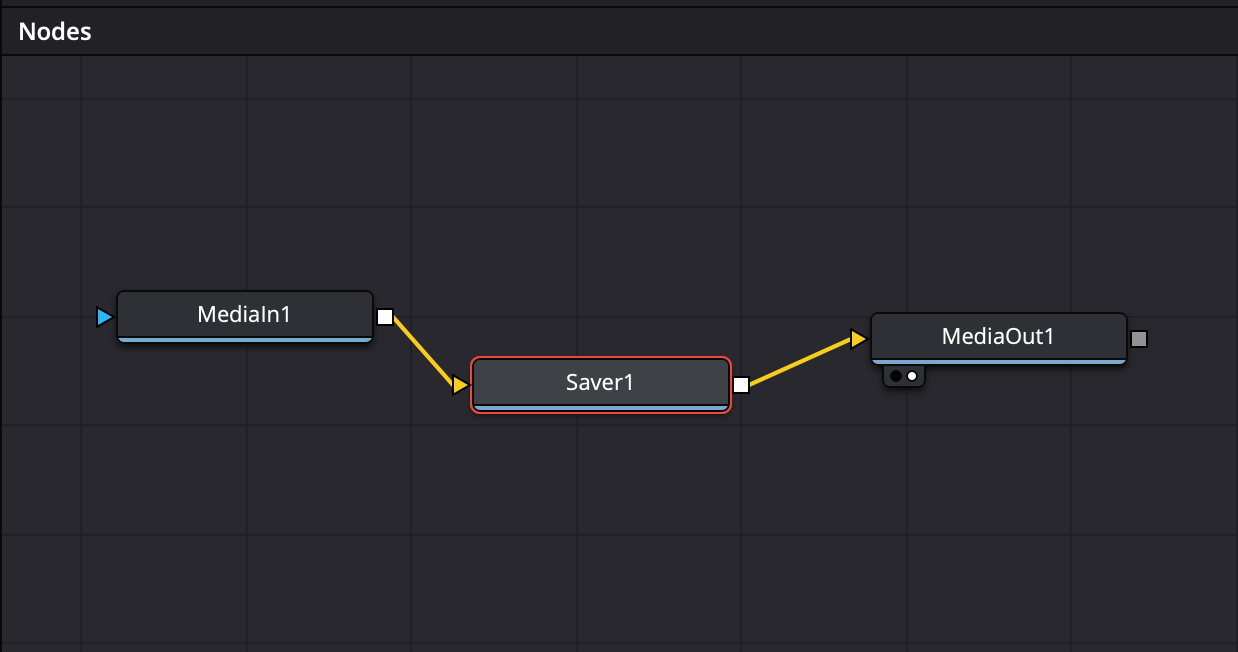
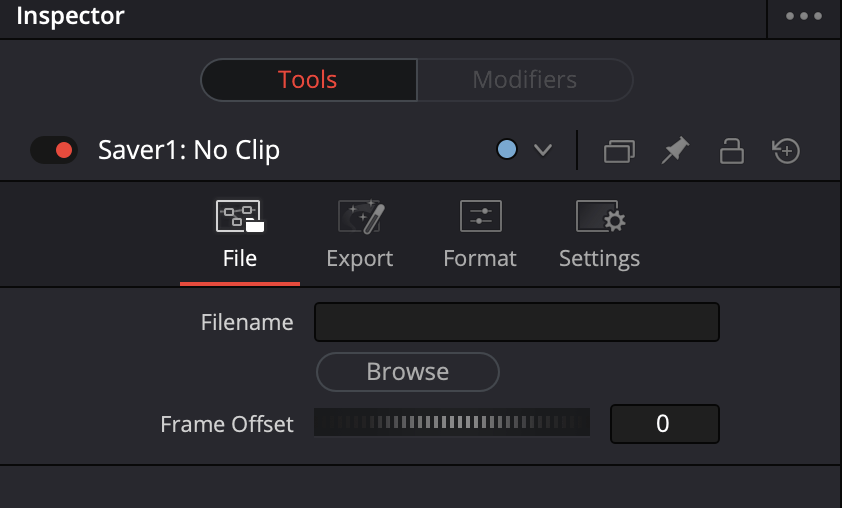
- Go into the Fusion page
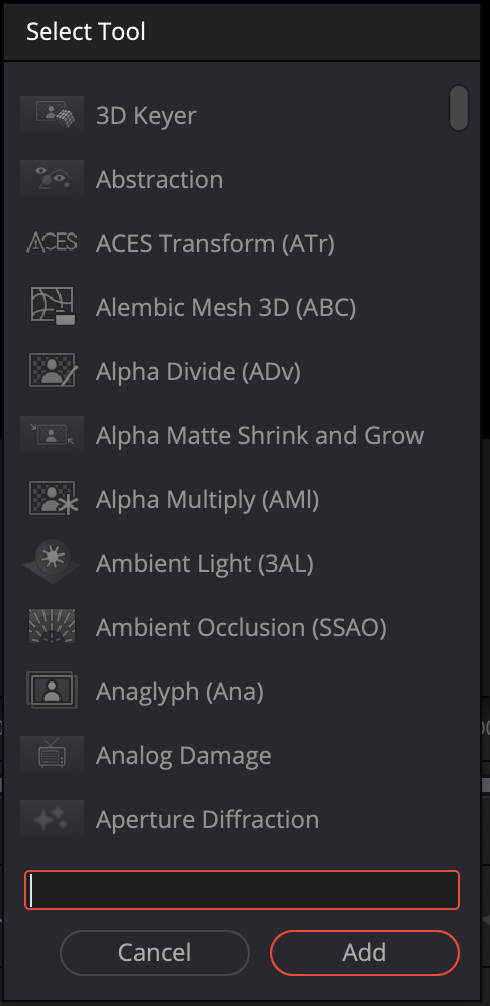
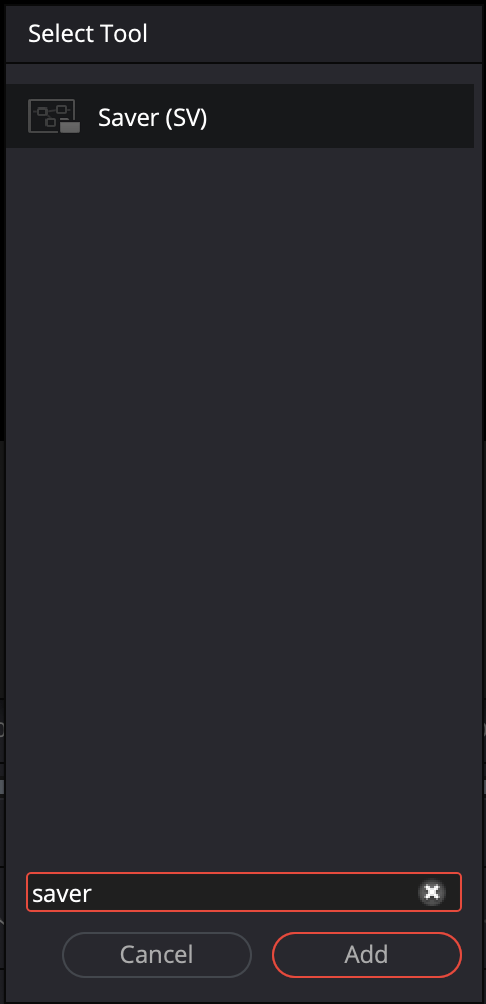
- Press shift + space to open the search bar, type in “saver”
- Change the settings in the inspector accordingly
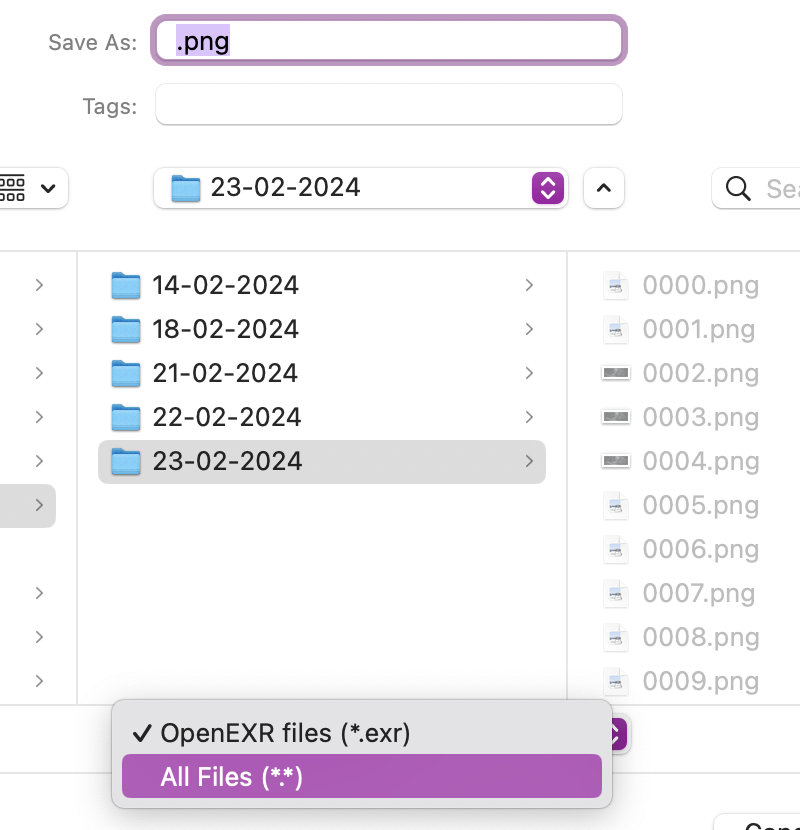
- Select a location to save the image sequence
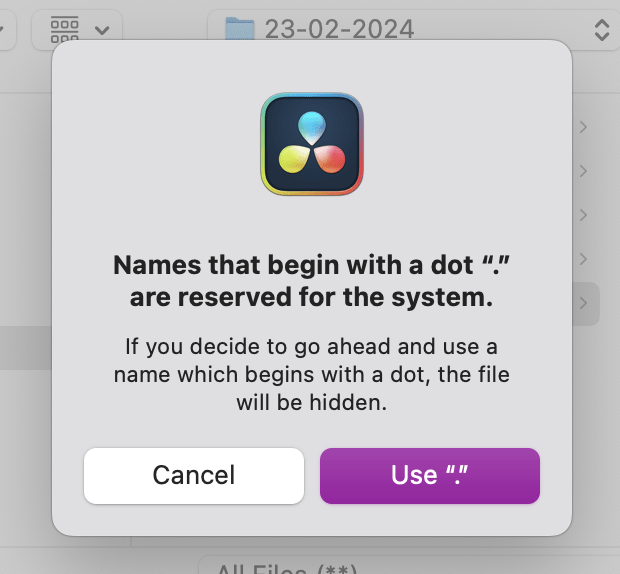
- Confirm the error message
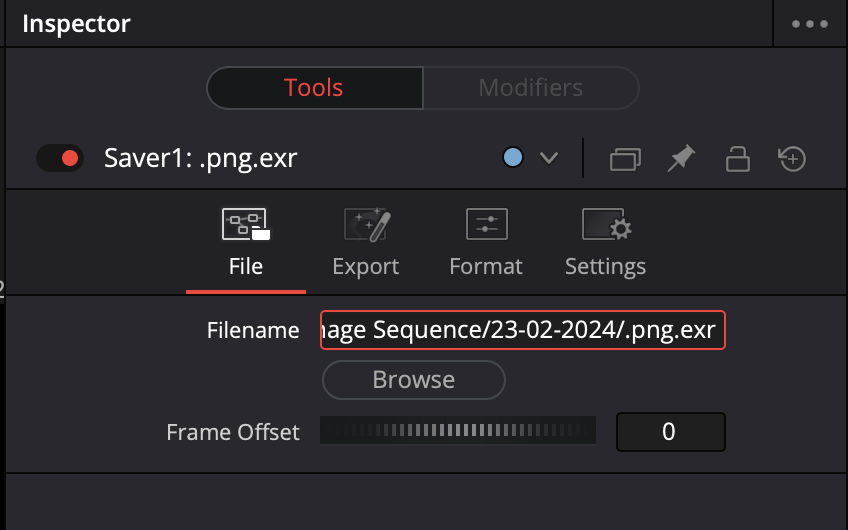
- Go back to the inspector and change the file extension to PNG (Or another format you prefer)
- In the menu bar of DaVinci in the Fusion tab click “Export all saver”

What I like and appreciate about this method is, that if the system crashes and freezes, you don’t loose progress since Resolve is exporting each frame as a single image file. If your system crashes for some reason (this has been the case for me), you can start from where it last left off.
Option 3 - Importing an image sequence - Part 2
Now you’ve got a bunch of stills images, but how to import them back to resolve and make it a motion picture again? Don’t worry, I got you. This step is much easier and faster than Part 1.
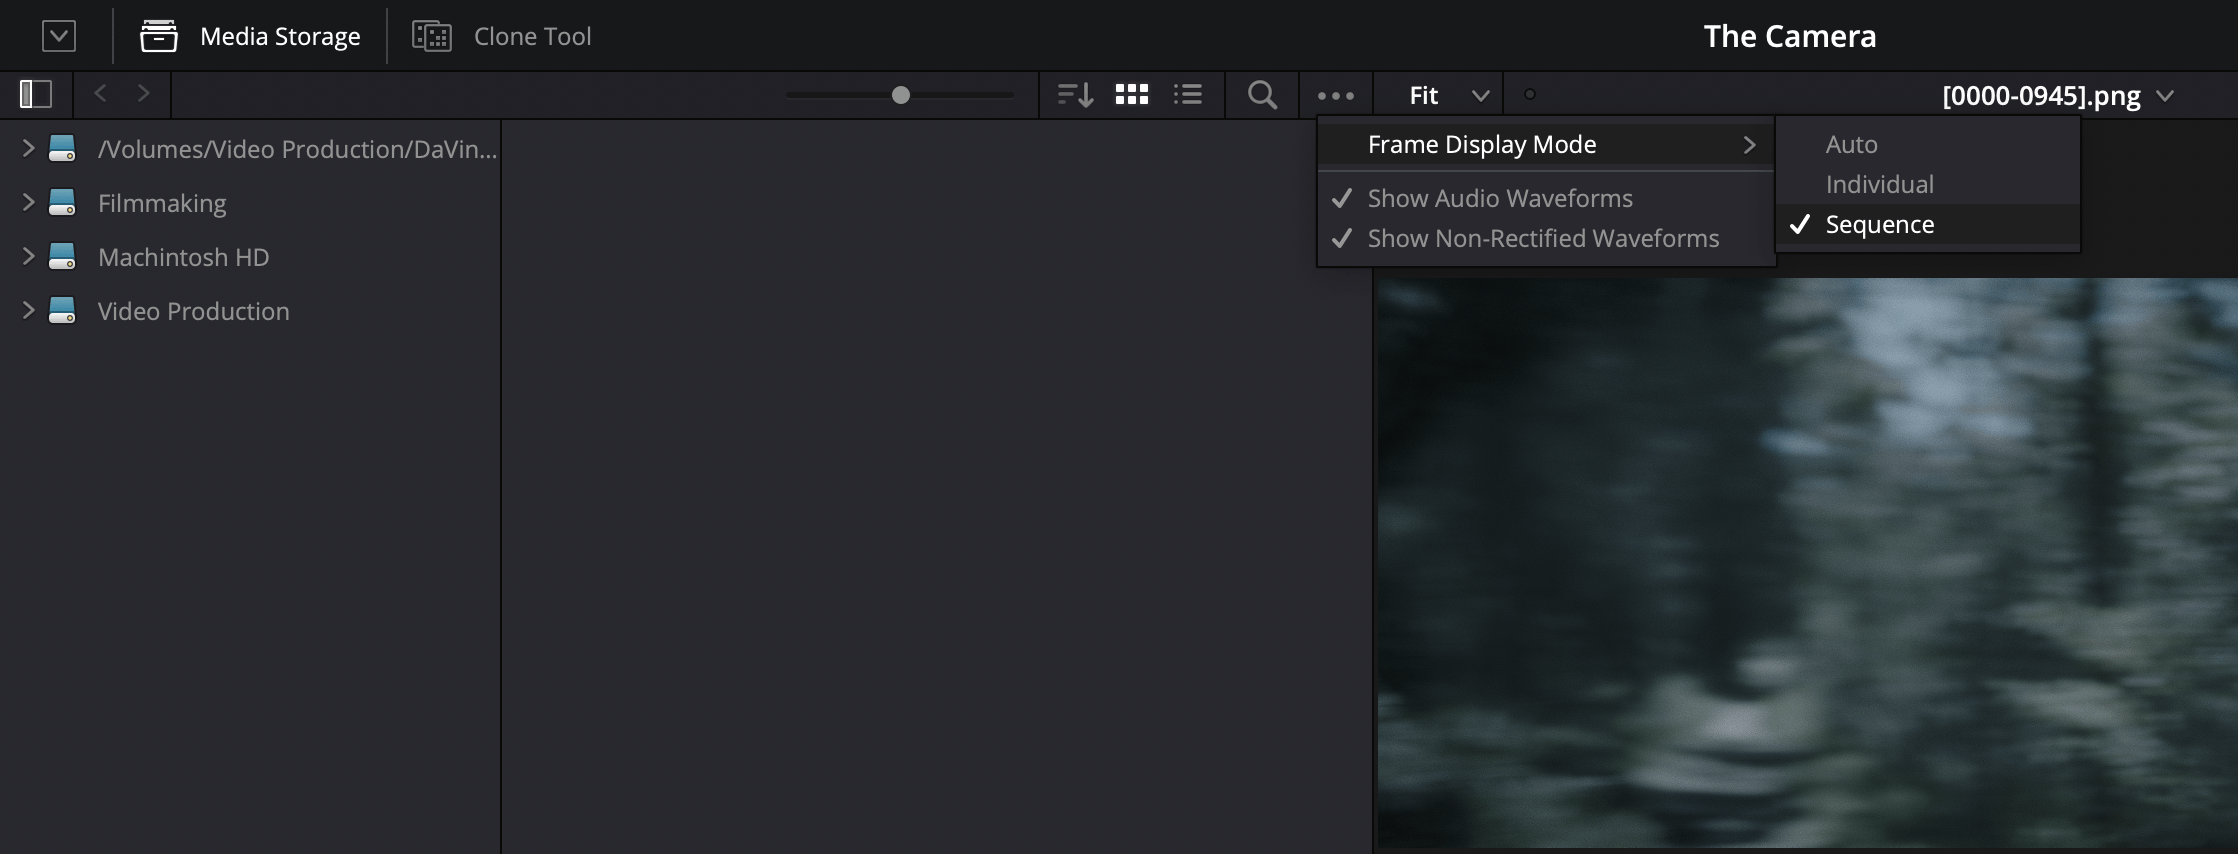
- Go to the Media tab in Resolve
- In the top middle of the screen right before the viewer window begins, click the three dots
- Hover over “Frame Display Mode”
- Select “Sequence”
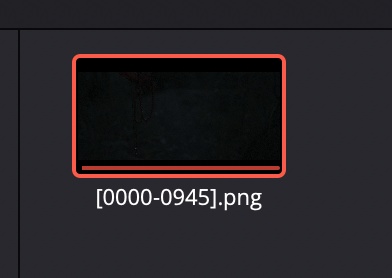
- Drag and Drop your images into the media pool
- Drag the image sequence into your timeline
After I imported my image sequences most of the rendering part was done, only for a few scenes (the once with heavy FXs applied) I had to go back to the previous method, rendering in place.
Option 4 - (Pre-)Render Fusion Clips & Color adjustments
Another good way to pre render some parts of your project is to just render Fusion or Color Nodes that are very intense to process. This not only gives you more flexibility of which effect shall be rendered or rather cached, but it will also improve your playback performance in the timeline.
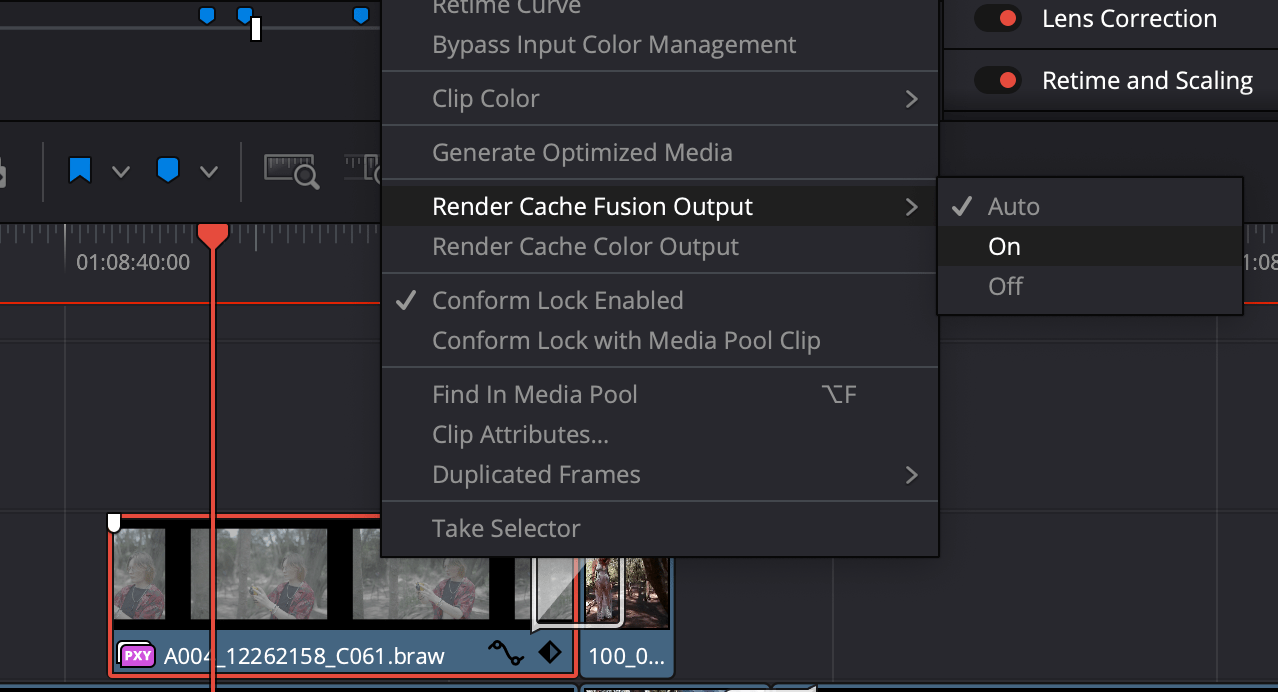
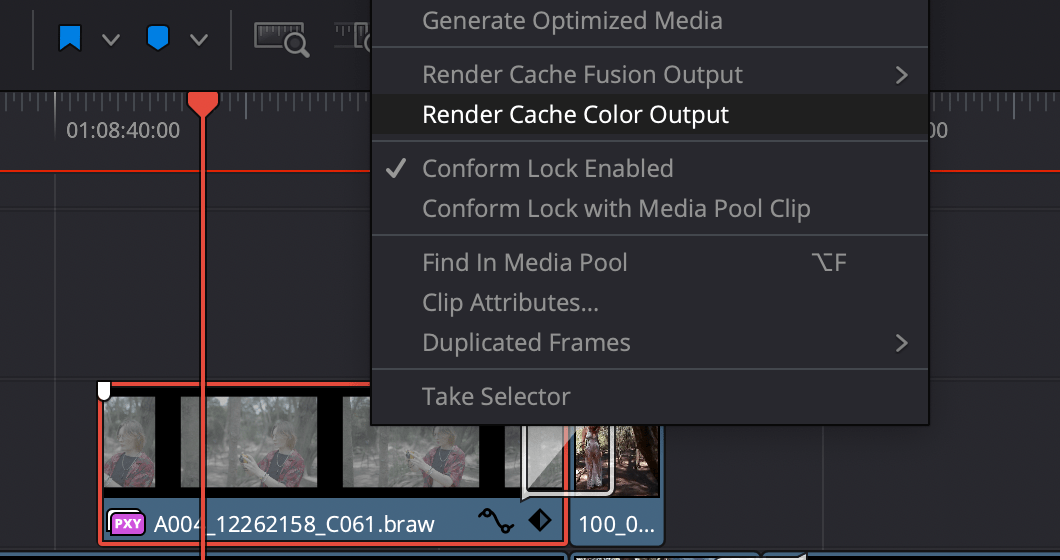
- Right click on a clip in your timeline
- Select either “Render Cache Fusion Output” or Render Cache Color Output”
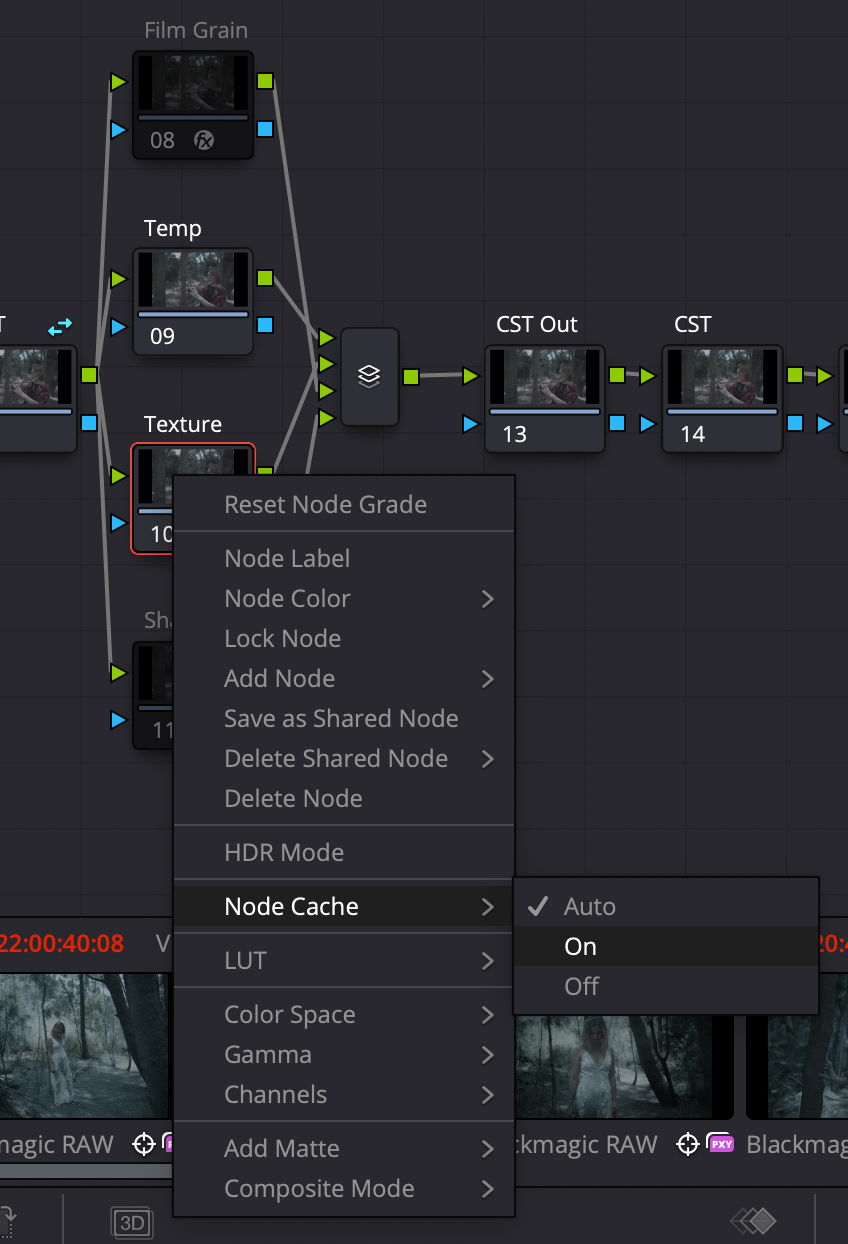
There’s another Caching option within the color page that can be used to cache single nodes, instead of all the color adjustments. In my case, there’ve been just a few nodes in the color page that caused the issues. Caching them would have helped as well. Sometimes you really have to analyse what the source of the problems is to not waste time and resources.
Option 5 - Effects stacking and render stacking
This method I wasn’t actually using but I was considering as one of the last few options to render this project. You basically duplicate the timeline and remove or disable the heavy effects applied to the clips in the timeline. Render these clips out, either through “Render in Place” or render the entire project and export it as individual clips. Next step is to import the clips back and apply one FX after another and render it out again to import and apply the next FX . This method might be very time consuming but you gradually get to the final result. However make sure to export as ProRes files, otherwise you’ll lose quality. Another downside of this method is that it quickly adds up a lot of files to your hard drive.
Option 6 - Splitting the timeline
In my early attempts to render this project was to simply create compound clips of the entire timeline and split the timeline in multiple pieces so that I had 1 minute timelines which then should get stitched together in the final timeline after rendering out the 1 minute clips. This method was fairly simple and didn’t require much work from my side, but this didn’t help since the FX that caused the computer to crash still crashed the system.
Maybe this solution could be helpful in some scenarios in the future, that’s why I mentioned it.
Upgrading your system or get it rendered externally
If the methods I just mentioned still don’t help there are a few more things you could do and believe me I was considering both and even tried the first one (which didn’t work in my case)
Upgrading your system
For those who have a desktop PC it’s easy to upgrade the RAM or GPU to increase the performance. In my case, with a MacBook Pro I couldn’t upgrade the hardware components, but there is an option to attach an eGPU (A standard PC graphics card in an Enclosure) to boost GPU performance. I ordered an enclosure and a supported GPU, plugged it in, but the card wasn’t recognized. I ordered a second card, but same issue. After reaching out to the Apple support and the support of the enclosure I decided to no further pursue this option. I then went with option 2 and 3.
But in theory plugging in an external eGPU can be beneficial and help a lot in terms of the overall performance in DaVinci Resolve.
Let someone else render your project for you
There are online services out there that have the processing power and offer to render your project for X amount of money. Depending on your budget this might be worth considering.
Resources on YouTube
Watch the YouTube tutorial of this article here
Watch the final short film here
Conclusion
There are many different editors to choose from and every single project is uniquely different. There is no one solution that solves everything, but I hope this gave you an overview of DaVinci Resolve and what to do when your project is too heavy for your system to render.
Looking back the post-production and mostly the renderings cost me a lot of nerves and I’m pretty sure some people would have given up, but at the same time it was an amazing learning experience and this alone was worth the effort. One month of rendering and figuring out how to finally export this project was worth it because the resonance and positive feedback we gained is remarkable and it’s what keeps me going as a filmmaker.

Self-educated creative problem solver and entrepreneur. Writing about personal development, self-education, photography & filmmaking.
Hashtags:
#filmmaking #film #movie #short #story #storytelling #visual #camera #script #actor #director #audience
Thank you for sharing your personal experiences and stories It takes courage to open up and you do it with such grace and authenticity
I loved as much as you will receive carried out right here The sketch is tasteful your authored subject matter stylish nonetheless you command get got an edginess over that you wish be delivering the following unwell unquestionably come further formerly again as exactly the same nearly very often inside case you shield this hike.
This website has quickly become my go-to source for [topic]. The content is consistently top-notch, covering diverse angles with clarity and expertise. I’m constantly recommending it to colleagues and friends. Keep inspiring us!
Hey, I’m Jack. Your blog is a game-changer! The content is insightful, well-researched, and always relevant. Great job!
Thanks for sharing. I read many of your blog posts, cool, your blog is very good.